Friday 29 July 2011

great googleymoogley!

it's been a busy few months in the Flibble household, but I finally got back into doing a little sewing. I say a little... about 8 hours to be exact. Even hand hemmed it ;)


Minime needed a new party dress ;) the fabric shop (fabric8 in colchester) had a massive remnant of silky, dotty polyester for £8 and their remnants were on 3 for 2, so basically this ended up being free!!


I used a Butterick pattern, and lined the dress with lining from another I'd been given recently. I also used the zip from that too. the buttons on the bows came from my mother in law. aparently they used to be on husband's baby cardigan!!
 Aparently it's "swishy, dancey and princessey". perfect.
As the party was a "fairy and princess party" I thought what the heck. let's do some free standing lace wings for giggles. Urban Threads I love you.

Great! no. 1. sewing machine lies. it said 72 mins PER WING.  this is not so. with all the swearing, tearing, breaking etc it ended up being nearer 2 hours per wing. but they do look fab!


And I had enough fabric left over to make the Birthday Girl a crayon tote too. complete accident that Disney Princess crayons match the dots so well!


Beutiful Girlie wore makeup. she scrubs up well. not bad for someone who also just graded in Karate and is now at 9th Kyu!


Friday 20 May 2011

New Stuffs

I've been neglecting my blog. sorry. not that anyone reads it... ahem.

I finished my Drops cardigan.

 Made a wind chime for the wind chime swap on craftster


had a cup of tea

 made sophie some new jammies from fabric she requested
made myself a new handbag
 was a terrible parent letting sophie eat crisps and wear dressing up earrings before school
 had my hair cut
 lined a really funky bag with really funky fabric for a 5 year old girlie
 here's the outside of her bag
 got to grips with my new embroidery machine
 and made myself some shorts.
 oh, and finally I captured another fairy.

Tuesday 5 April 2011

Last Minute Bonnet

I had something sprung on me this morning. my daugther has been ill for a week, and has been off school so I didn't get any information about their spring/eater bonnet parade tomorrow. ARGH.

I had a choice, walk a mile to the pound shop and buy plastic crap which would be binned later on, or make a bonnet and let Sophie decorate it.

the bonnet took a little over 2 hours and was from this tutorial:

http://givenmoments.blogspot.com/2008/01/bonnet-tutorial.html

everything on it was her choice, positions were her choice. she made the daffodils (I cut out the cardboard for her, she painted and glued them and then I sewed them on), she decorated the blown egg (aparently it's flowers, I think it's beautiful but then I'm her mum!)

she chose the feathers, fabric daisies and they're glued on with PVA(school) glue so they can be soaked off and the bonnet worn/decorated again.

not bad considering I basically had almost no warning lol.
the person modelling the bonnet is me, Sophie is in bed as it's 10pm here lol. glue's still not properly dry, and I made the hat stand fro a balloon, sheet of newspaper, PVA glue, cooking ingredient pot (arrowroot or bicarb i think lol) and lentils (weight) for tomorrow because if i leave it in a bag it's gonna get destroyed before the parade!


Tuesday 29 March 2011

Cornbread

225g butter (I use Vitalite; a stable, dairy free margarine. don't use Pure and don't use oil.)
225g plain flour sifted
225g polenta grains  (fine works better imho)
1 tbsp baking powder
1 tsp salt
125g caster sugar
2 large or 3 small eggs
475ml full fat milk (I used half fat, still works lol)


preheat oven to 180.c or gas 5

put the butter/fat into a 23cm square or round baking tin and put in the oven to melt
while butter melting put the flour polenta salt sugar and baking powder into a large bowl and make a well in the centre break in the eggs and add the milk and the melted butter/fat
mix well until all combined but will need to do this quickly or the butter/fat will harden
pour the mix back into the tin and bake for 30-40 mins until well risen and golden brown

the bread will sink a little after cooking
can be eaten hot or cold. I like it hot form the oven with a little more marge on the top. it's much like a corn scone.

nomnomnom

New Things... mwaaaaaa!

Ok, so this week I have been mostly ignoring the housework again and mending my brain through home made art therapy.
And also mending other's brains too lol. here are some margie-warna earrings...


one has a doob, the other a bowl of herb, a packet of rizlas and a lighter.
 
and here is a little, erm, thingummy. it has cherry blossom on a blue sky background. I'm not sure what to do with it yet.


finally, this week saw thw first (and second, and third) harvests of Purple Sprouting Brocolli form my garden. woot!

Sunday 20 March 2011

I've begun painting again


acrylic on canvas, mixed media.

Random post sunday!!!

Désolé pour ma français merdant!!! oui! les moules! fait au pays d'oc de l'angleterre (au cidre et à l'ail avec du thymes et un petit peut de fromage à la crème); il y a des moules Ecossaises. nomnomnom.


translation: yes! Mussels! cooked in the west country fashion with cider, garlic and a little cream cheese, here are Scottish Mussels. nomnomnom.

what follows is desturbing in the extreme. a 32 year old hair engineer wearing the hat and scarf of a small girl...

(I made the hat)

How do you wind wool from a skein to a ball without a spare pair of hands? use feets!


I am embracing my inner goth again.

The Handbag of Mental

My mum's birthday was coming up (yeah, I'm about a month behind in my posts... sorry) and Iwanted to give her something personal.


Filet Crochet in plain, white, cotton thread using a 3mm hook. it's about 30cms in width. pattern designed by me. it basically took about 3 x 2 hour karate lessons (husband and child do the karate, I sit on the sidelines getting bored lol) plus some evenings of TV watching.

it's lined with velvet, you can't really tell on the pictures (damned camera phone) but I have turned the velvet right side out so the fluffy side is beneath the filet and gives another dimesnsion of texture, and the smooth side is facing inwards.

Kelly's Birthday Frame

I had completely forgotten my friend's birthday; so with 24 hours notice and zero monetary outlay, I threw this together. Seriously.

1 unfinished pine frame from my stash of "stuff i need to get on with"
some rose coloured ink
sulky silk effect polyester thread in pink
sulky metallic thread (rainbow)
two card bradlets (hammered into the wood!)
1 broken earring
a load of modpodge.
fabric scraps
photoshop knowledge and a printer.

I started with the frame, painted it with ink, wrapped around the threads and hammered in the small bradlets and the earring. it only had a little stubby bit of metal left on the back of it, i dont think a full length stud earring would have worked with the hammering!
covered with copious amounts of modpodge glossy.


then i started on the picture while that was drying, i took a photo off my friend's facebook account and photoshopped the heck out of it to make it more arty. I then embroidered the little girl's name onto a scrap of gingham ribbon. then I modpodged some cotton voile onto backing card (made form a pizza menu Wink ) and left to dry.
I layered the voile/card, picture and name plate using card making glue dots.


all was assembled the morning of her birthday celebration....
she loved it!!

Monday 28 February 2011

The Sofa of Genius

We had a tear in our 6 year old, very well used, quite loved leather sofa. TRADGEDY! We also have no money to replace it unless my husband goes out and works himself to death doing overtime for at least three months.
I was all for getting credit etc, but he didnt want the added burden of more financial hassle. I do see his point, and agreed that we should hold off buying a new one for a while; but only if he could come up with a way to fix the sofa.

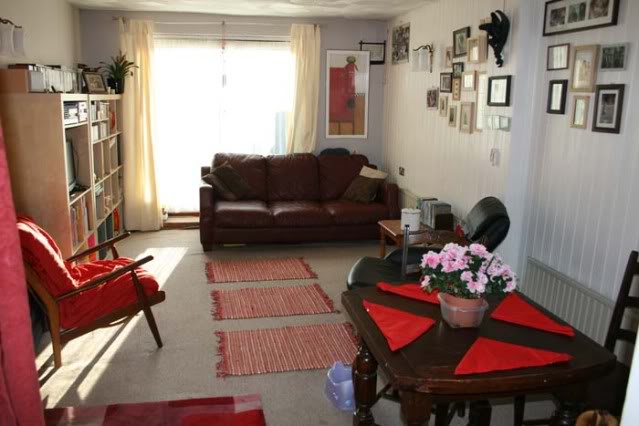
On the three seater, the tear was between two of the fixed seat cushions, and was very noticable when one sat one's massive butt on the sofa. also, things kept falling into the gap only to be lost forever in the base of the sofa. here's the three seater, circa 2009


the two seater, at this time, was in our kitchen.

here it is, yesterday, in my livingroom


Back to 2011... So, my husband; an engineer by career but a designer by training, set to work trying o work out what to do.

We had a matching two seater and three seater set bought in 2005 when we moved into our first flat. they were cheap. they were badly constructed and within the first year he'd had to fix them.

bodge repair circe 2006 lol


ok. here's some pictures of the process....

jim unbolting an arm form the three seater, after having taken off the base part


the scariest bit was this, then he had to cut the broken piece off the end of the three seater. basically, it was torn so we'd not lost anything if it went horribly wrong at this stage.


Sophie was used as extra ballast. and for cute appeal.

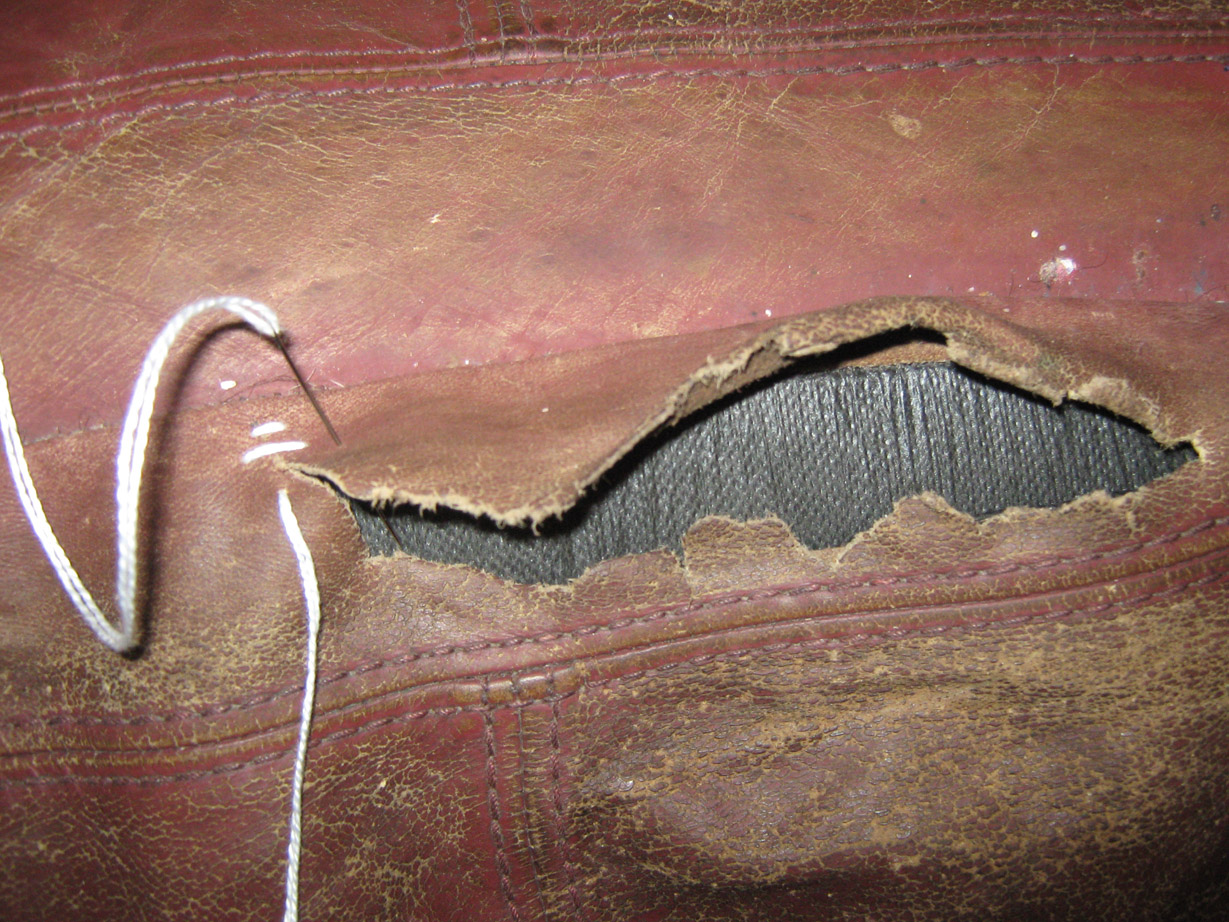
once he'd done this, I could mend the tear as best I could. it'd later be hidden by the arm of the sofa being bolted back on, but i needed to be mended so that the leather which was folded under and stapled had enough strength. one big needle, one pair of pliers, ten hurty lady fingers lol


ummmm... this bolt? or this one?


ooooh! coming together...


under the back, right hand, corner bit is a box made from scrap wood which supports the cushion of that particular bit of the three-seat side. It's not there for security, just cosmetics. it will eventually be used for storing the laptop when not in use I think.

nearly finished!

the corner part was made from the non-torn portion of the torn cushion, and is supported with scrap wood and green elastic strapping from the deconstruction of the three seat. The padding is made from our daughter's old cot-bed mattress lol. woot! recycling!

enter a large lady in a onesie to upload pictures of the new sofa, and to test out the corner. mwaaaaaaa!


tomorrow: burgundy boot polish + two brushes + chamois = new looking leather.

Followers